Xcode插件开发教程指南
对于Xcode而言,我们苹果开发者并不陌生,对于Xcode的插件,我们也不陌生。但是,有几个人做过Xcode插件呢?!Who care?显然,博主是关心的,这里分享一下博主自己开发插件的过程。
在平时开发过程中我们使用了很多的Xcode插件,虽然官方对于插件制作没有提供任何支持,但是加载三方的插件,默认还是被允许的。第三方的插件,存放在 ~/Library/Application Support/Developer/Shared/Xcode/Plug-ins文件夹中,后缀名必须是.xcplugin ,其实际上是一种bundle。所以我们创建一个插件工程,直接创建bundle工程即可。然后通过修改后缀名为.xcplugin,将其放到~/Library/Application Support/Developer/Shared/Xcode/Plug-ins目录中即可。
Xcode插件开发现在主要通过两种方式实现,其实也就是一种,只不过其中一种是使用别人提供的开发模板来省去很多中间步骤而已。文章会依次详细介绍两种的实现方法。
准备工作
方式一:通过Bundle实现
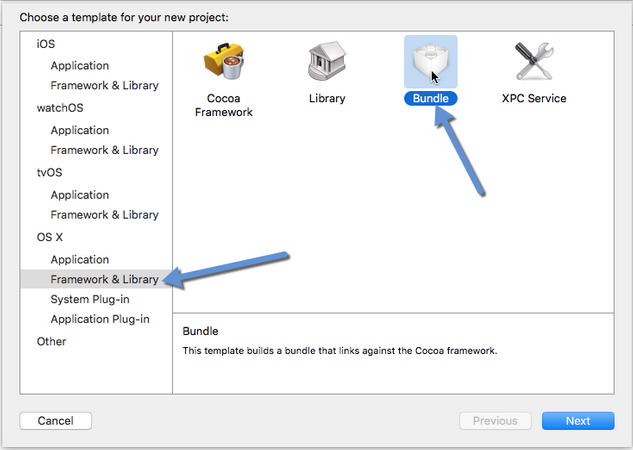
1.创建Bundle工程
2.工程设置
插件工程和普通的bundle工程还是有区别的,所以需要进行特殊的设置。
1)工程的plist文件
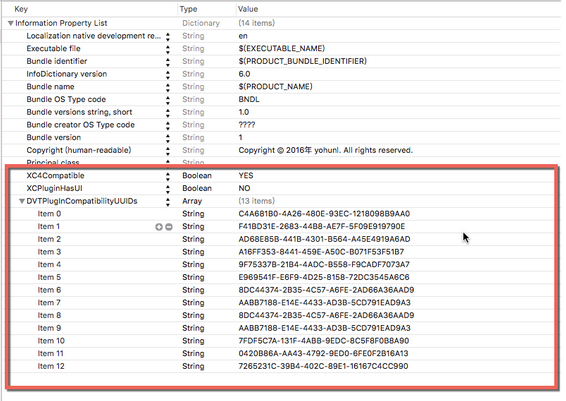
添加三项:
XCPluginHasUI = NO
XC4Compatible = YES
DVTPlugInCompatibilityUUIDs 这是一个数组。数组内容字符串,指示了该插件兼容的Xcode版本,只有对应版本的Xcode的UIID加入这个数组,插件才能被加载。
否则,即使将插件放入Xcode的插件文件夹,插件也不会被加载。获取当前版本的Xcode的UUID方式:
在terminal中输入命令:
1 | defaults read /Applications/Xcode.app/Contents/Info DVTPlugInCompatibilityUUID |
terminal会返回一串字符串,这就是Xcode的DVTPlugInCompatibilityUUID。
2)Build Setting
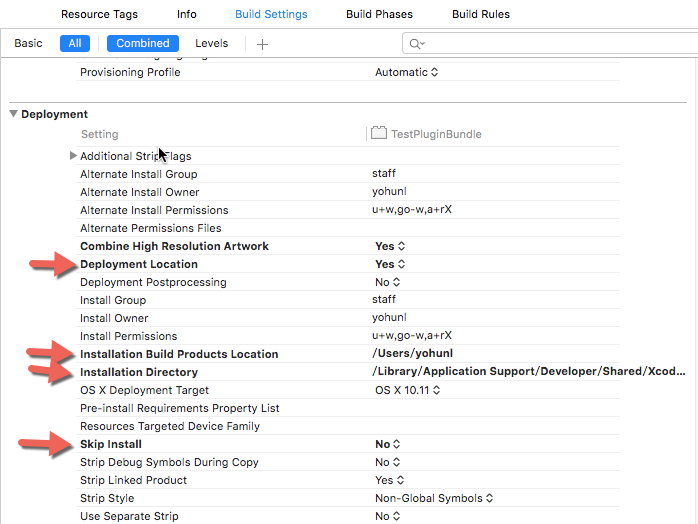

Installation Build Products Location 设置为 ${HOME} [显示的时候,显示的是你的用户目录],这个是products的根目录。
Installation Directory 设置为 /Library/Application Support/Developer/Shared/Xcode/Plug-ins,这个是指定你的插件安装的目录。
注意,这里填入的其实是相对目录。
插件的绝对目录是这样的,例如 /Users/yohunl/Library/Application\ Support/Developer/Shared/Xcode/Plug-ins/Alcatraz.xcplugin ,最后的绝对目录是 Installation Build Products Location和Installation Directory的结合,这也是为什么两者都要设置的原因。
Deployment Location 设置为 YES,这个是指示该工程不使用设置里的build location,而是用Installation Directory来确定build后放置的位置。
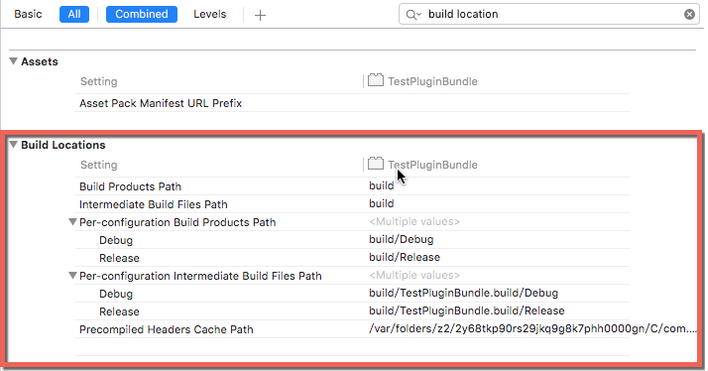
默认工程生成的相关文件位置都是 Build Locations指定的,通过Deployment Location 设置为 YES告诉工程,我们不使用这个默认的设置,而是我们自定义的。
Wrapper extension 设置为 xcplugin,后缀名必须为xcplugin,否则不会被加载。
方式二:通过模板实现
1)下载Xcode插件开发模板
地址:https://github.com/kattrali/Xcode-Plugin-Template
2)将下载下来的template复制到 ~/Library/Developer/Xcode/Templates/Project Templates/Application Plug-in/Xcode Plugin.xctemplate文件夹中,如果没有对应的文件夹就自己手动创建一个。
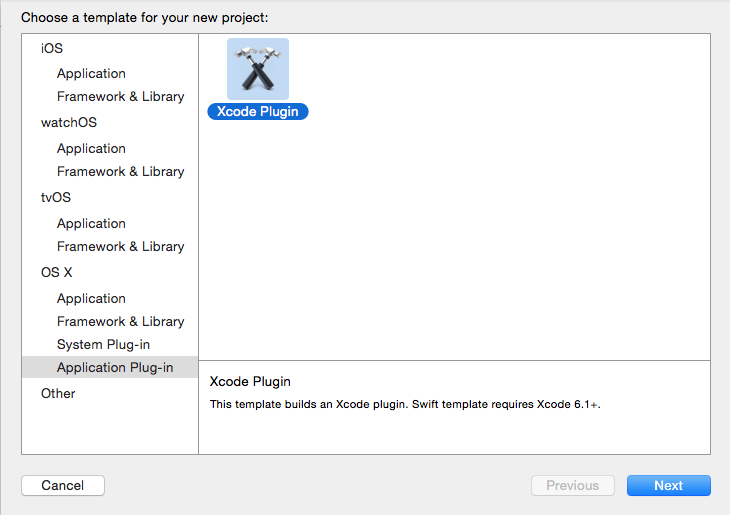
3)重启Xcode,当你新建一个工程的时候就可以在OS X中看到一个Application Plug-in的选项,里面有一个Xcode Plug-in模板。
实现
通过以上的两种准备方式,我们已可以创建Xcode插件工程,接下来就是如何实现插件功能。
1.功能需求
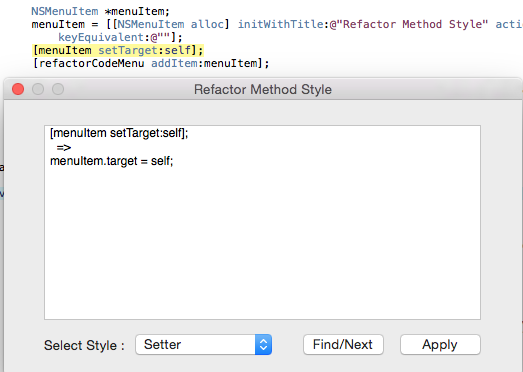
在当前选中文件中实现代码风格重构,目前主要实现setter方法这一风格重构。例如,
[self setName:@"Davy"]; ==> self.name = @"Davy";
2.思路分析
1)找到当前文件中符合setter方法命名风格的方法调用。
2)替换找到的符合重构风格的代码,提醒用户保存。
3.技术难点
1)Xcode代码编辑框文件内容操作。
2)正则表达式书写。
3)Xcode代码编辑框提醒用户保存文件。
关于最后一点,因为Xcode对于没有保存的已修改过的文件会显灰以提示用户该文件需要保存,我们可以借鉴这种方式。另外,在查找时,如果能够实现高亮并且跟随滚动,效果会更佳。
4.关键代码
以上这些问题,本人在“Refactor Code”插件中全部实现,现在放上关键方法。
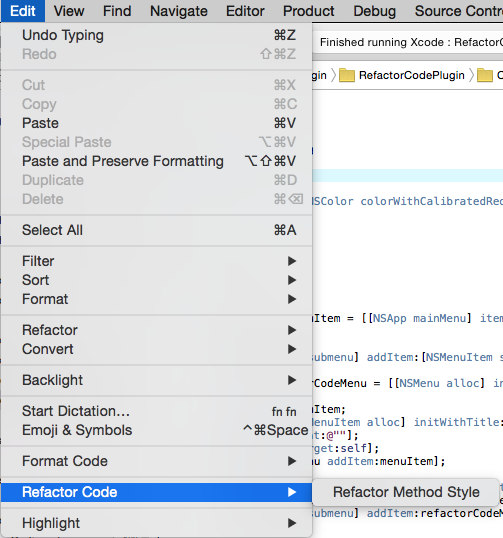
1)添加菜单
1 | -(void) setupMenuItem { |
效果图如下:
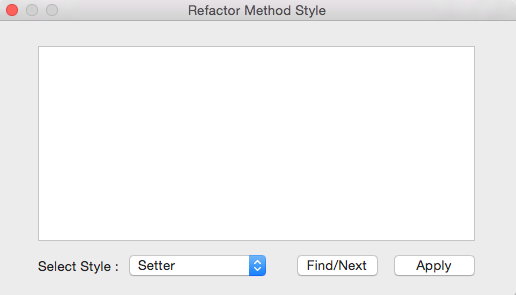
2)显示操作面板
1 | - (void)refactorMethodStyleMenuAction { |
效果图如下:
3)查找替换代码风格
这一部分是重点部分,包括如何书写正则表达式,并且利用正则表达式生成替换字符。还包括高亮代码,具体可以参见本人源码:https://github.com/CharsDavy/RefactorCodePlugin-Xcode
4)最终效果图
提交插件至Alcatraz
1.打开Alcatraz的插件包仓库,地址:https://github.com/supermarin/alcatraz-packages
2.在简介里可以看到Alcatraz的包分为三类,分别为:插件(plugins),配色方案(color schemes)和模板(templates)。每个包都必须包含”name”、”url”和”description”字段,还有一个可选的”screenshot”字段。
3.Fork这个仓库,再克隆到本地。
4.以添加”Refactor Code”插件为例,打开packages.json文件,在”plugins”数组里加入:
1 | { |
5.提交代码到Fork的地址,再提交一个pull request到Master即可。
6.merged成功之后,即可看见以下效果图
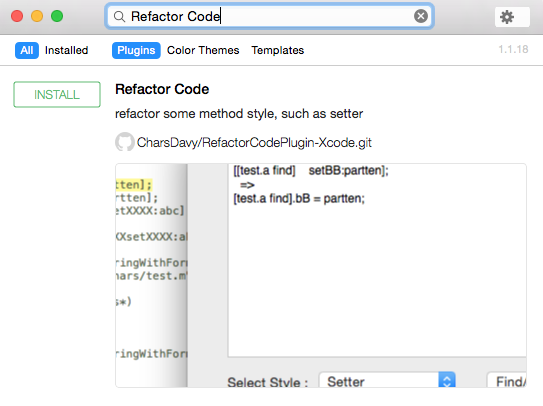
希望对大家有所帮助。